Home Blog Page 35

How Much Should I Be Able To Squat? (ANSWER)

0

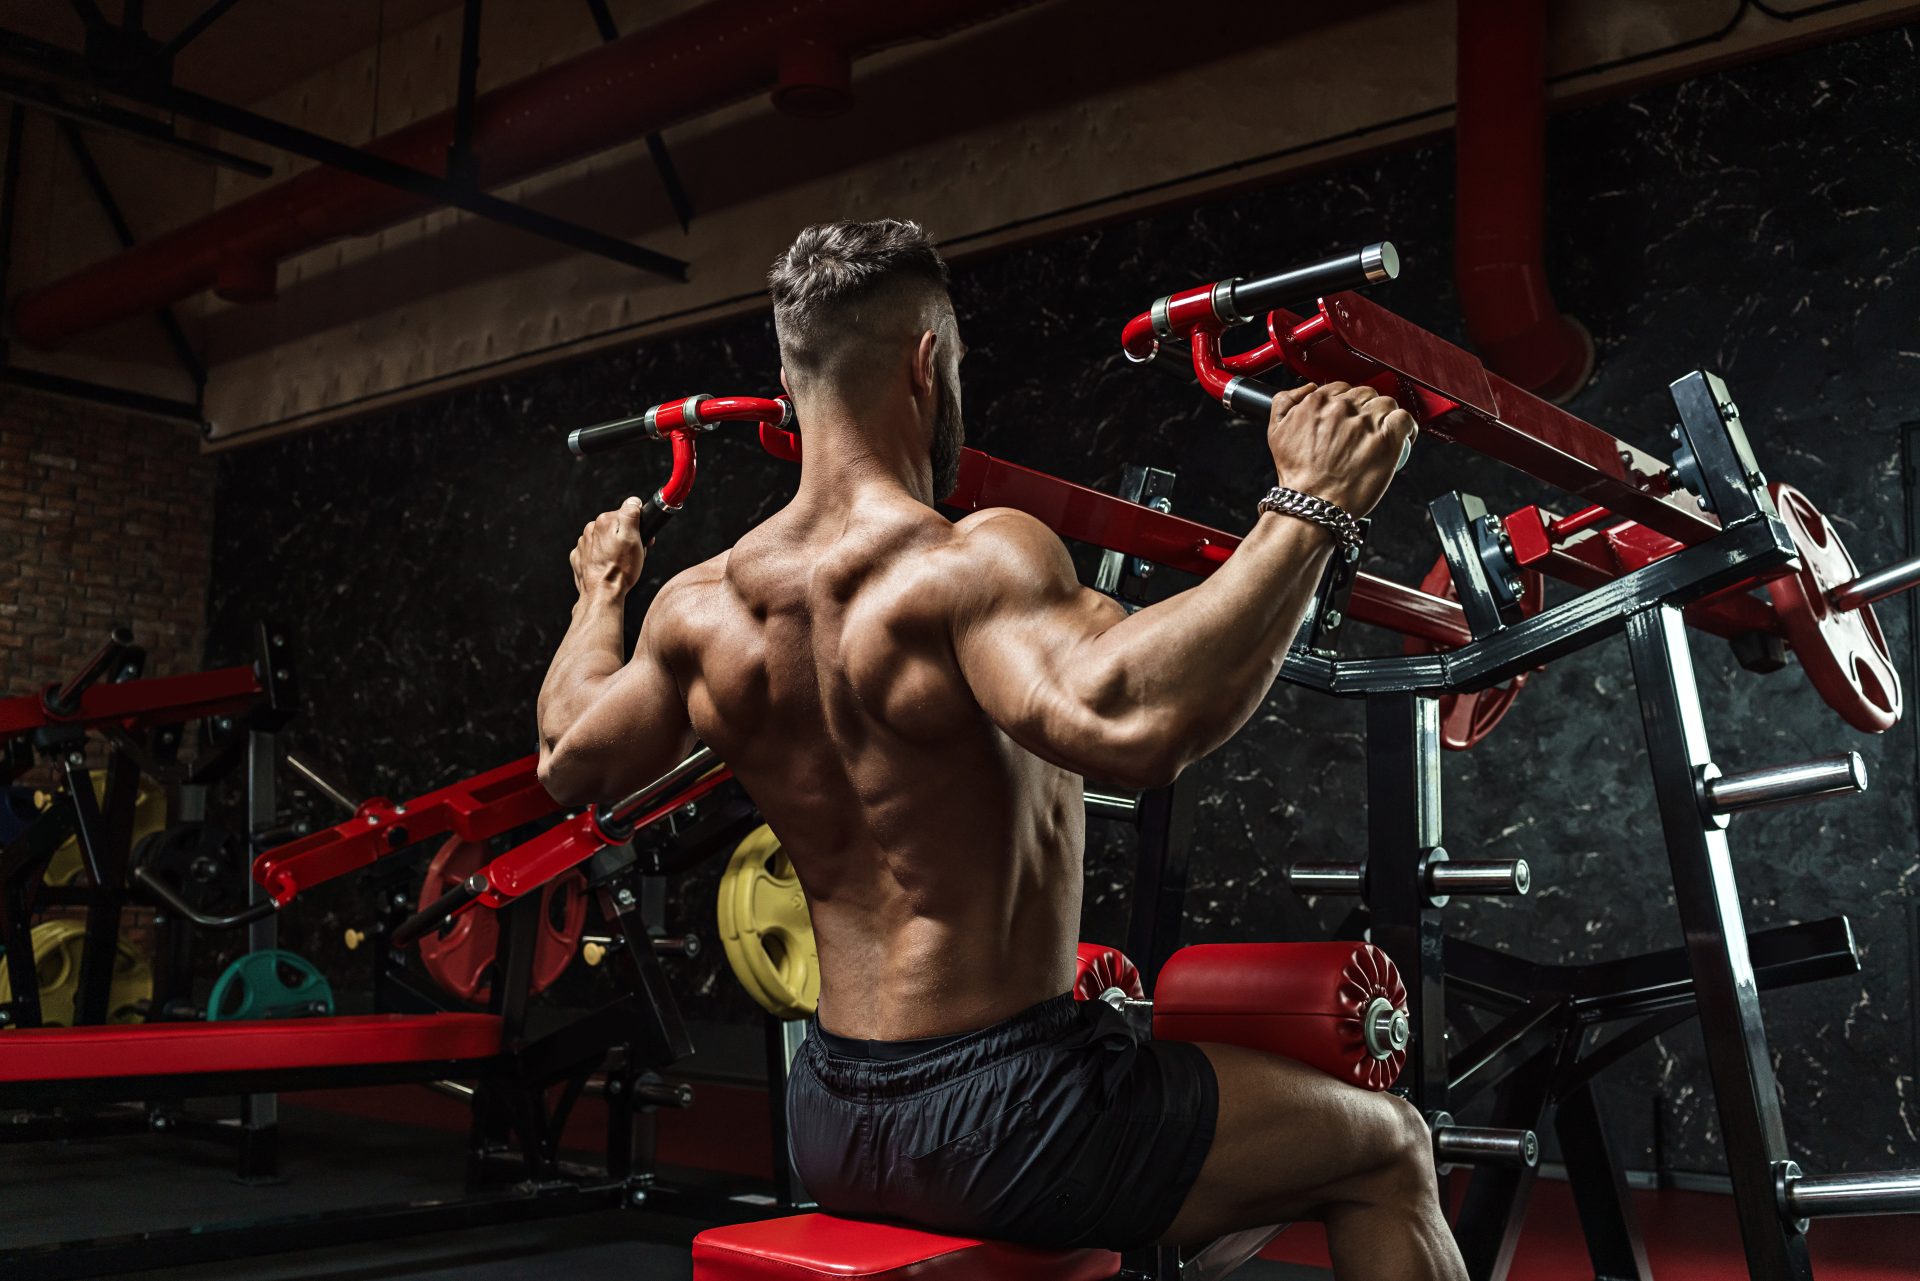
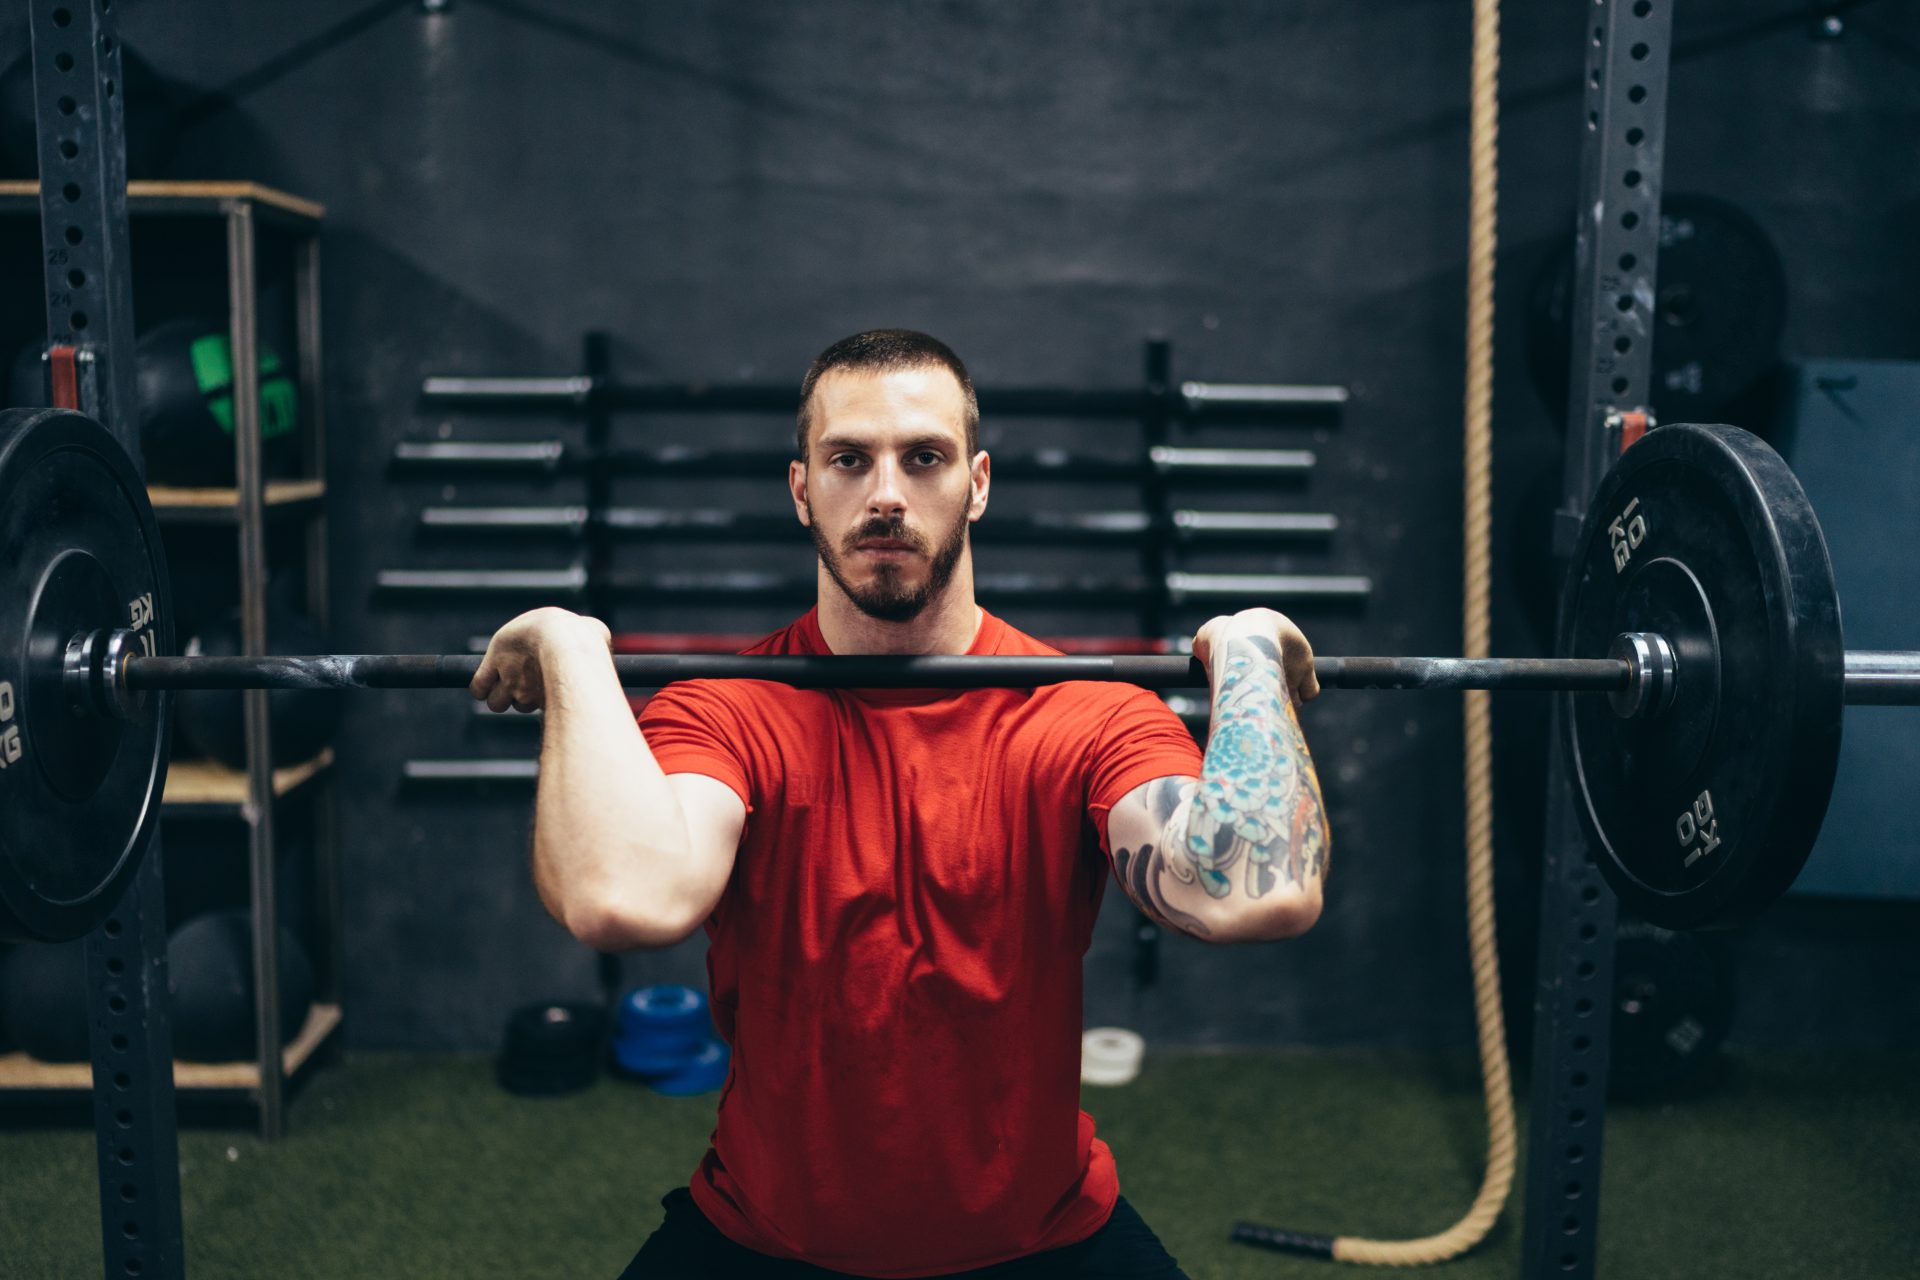
Squatting is an effective exercise for strengthening your legs, glutes, and core. In addition to these muscle groups, squatting also activates a variety of other muscles and helps improve your overall strength and fitness. When done properly, squatting can provide a vast range of benefits that will help you reach your health and fitness goals. Today we’ll answer the question: “how much should I be able to squat” and explore the various guidelines for performing squats correctly.

Squat = Basic One of the Most Important Exercises

Squatting is a fundamental movement that is essential for overall strength and fitness.

It targets multiple muscle groups in the legs, hips, and core, making it a highly effective exercise for building muscle mass and improving overall fitness.

In this article, we will take a closer look at squat strength standards for men and women, and provide tips for how to improve your squat performance.

It is an incredibly important exercise, especially for overall body strength and fitness.

One of the benefits of squatting is, it can target a variety of muscle groups including the legs, hips, and core, making squatting one of the most comprehensive body movement exercises.

Squatting also comes with many benefits.

Squatting based on the weight helps to reduce injuries when training in other leg-based exercises like running or cycling, as well as in everyday activities like walking or squatting up or down stairs.

In addition, squatting will also help increase flexibility, promote proper form during all activities, and strengthen the muscles used for balancing exercises.

With consistent squatting, you can be sure of increased muscular strength along with improved anterior posterior balance and burn some calories too!

Squat Strength Standards

Before beginning any type of strength or resistance training program involving squats, it’s important to understand the guidelines regarding proper form and technique (trusted source).

Generally speaking, the following strength standards are recommended based on body weight and gender:

  • Women – Bodyweight x 0.9-1.2
  • Men – Bodyweight x 1-1.5

In addition to these general guidelines, it’s important to keep in mind some common mistakes when squatting such as keeping your torso too upright or not pushing through your heels during the exercise.

These errors can significantly reduce the effectiveness of the exercise and increase injury risk if not corrected quickly.

Strength Standards for Men and Women

The table below provides general average values for squat strength standards based on body weight and gender.

These standards are based on data from various trusted sources, including the American College of Sports Medicine and the National Strength and Conditioning Association.

Bodyweight (lbs) Men (lbs) Women (lbs)
114 77 44
123 86 49
132 96 54
148 110 62
165 124 71
181 137 80
198 150 88
220 168 99
242 186 110
275 212 124


It’s important to note that these standards are not set in stone and individual differences in body type, muscle distribution, and training history will affect your squat strength.

Additionally, these standards are based on 1-rep max (1RM) and do not take into account reps performed at lower intensities.

Maximize Performance with Proper Form & Technique

Now that you understand some basic squat standards for both men and women, it’s time to focus on proper form and technique.

Knowing squat strength standards is a fundamental part of any athletes lifting journey.

Through the squat, one can measure and improve their progress, track their progress over time, and set personal squat records.

According to this general guide for squat strength standards based on body weight and gender, one can estimate what their squat should look like in terms of weight lifted.

Through trial and error, beginner adolescent lifters can use the squat as an invaluable way to gauge their progress with different weights as they strive for higher personal records (trusted source).

Experienced lifters will find these guidelines useful for finding the right weight that makes them sufficiently challenged without overstraining or injuring themselves.

No matter your level of squatting experience, this squat strength standard guide is a great resource that everyone can use to assess their squat performance!

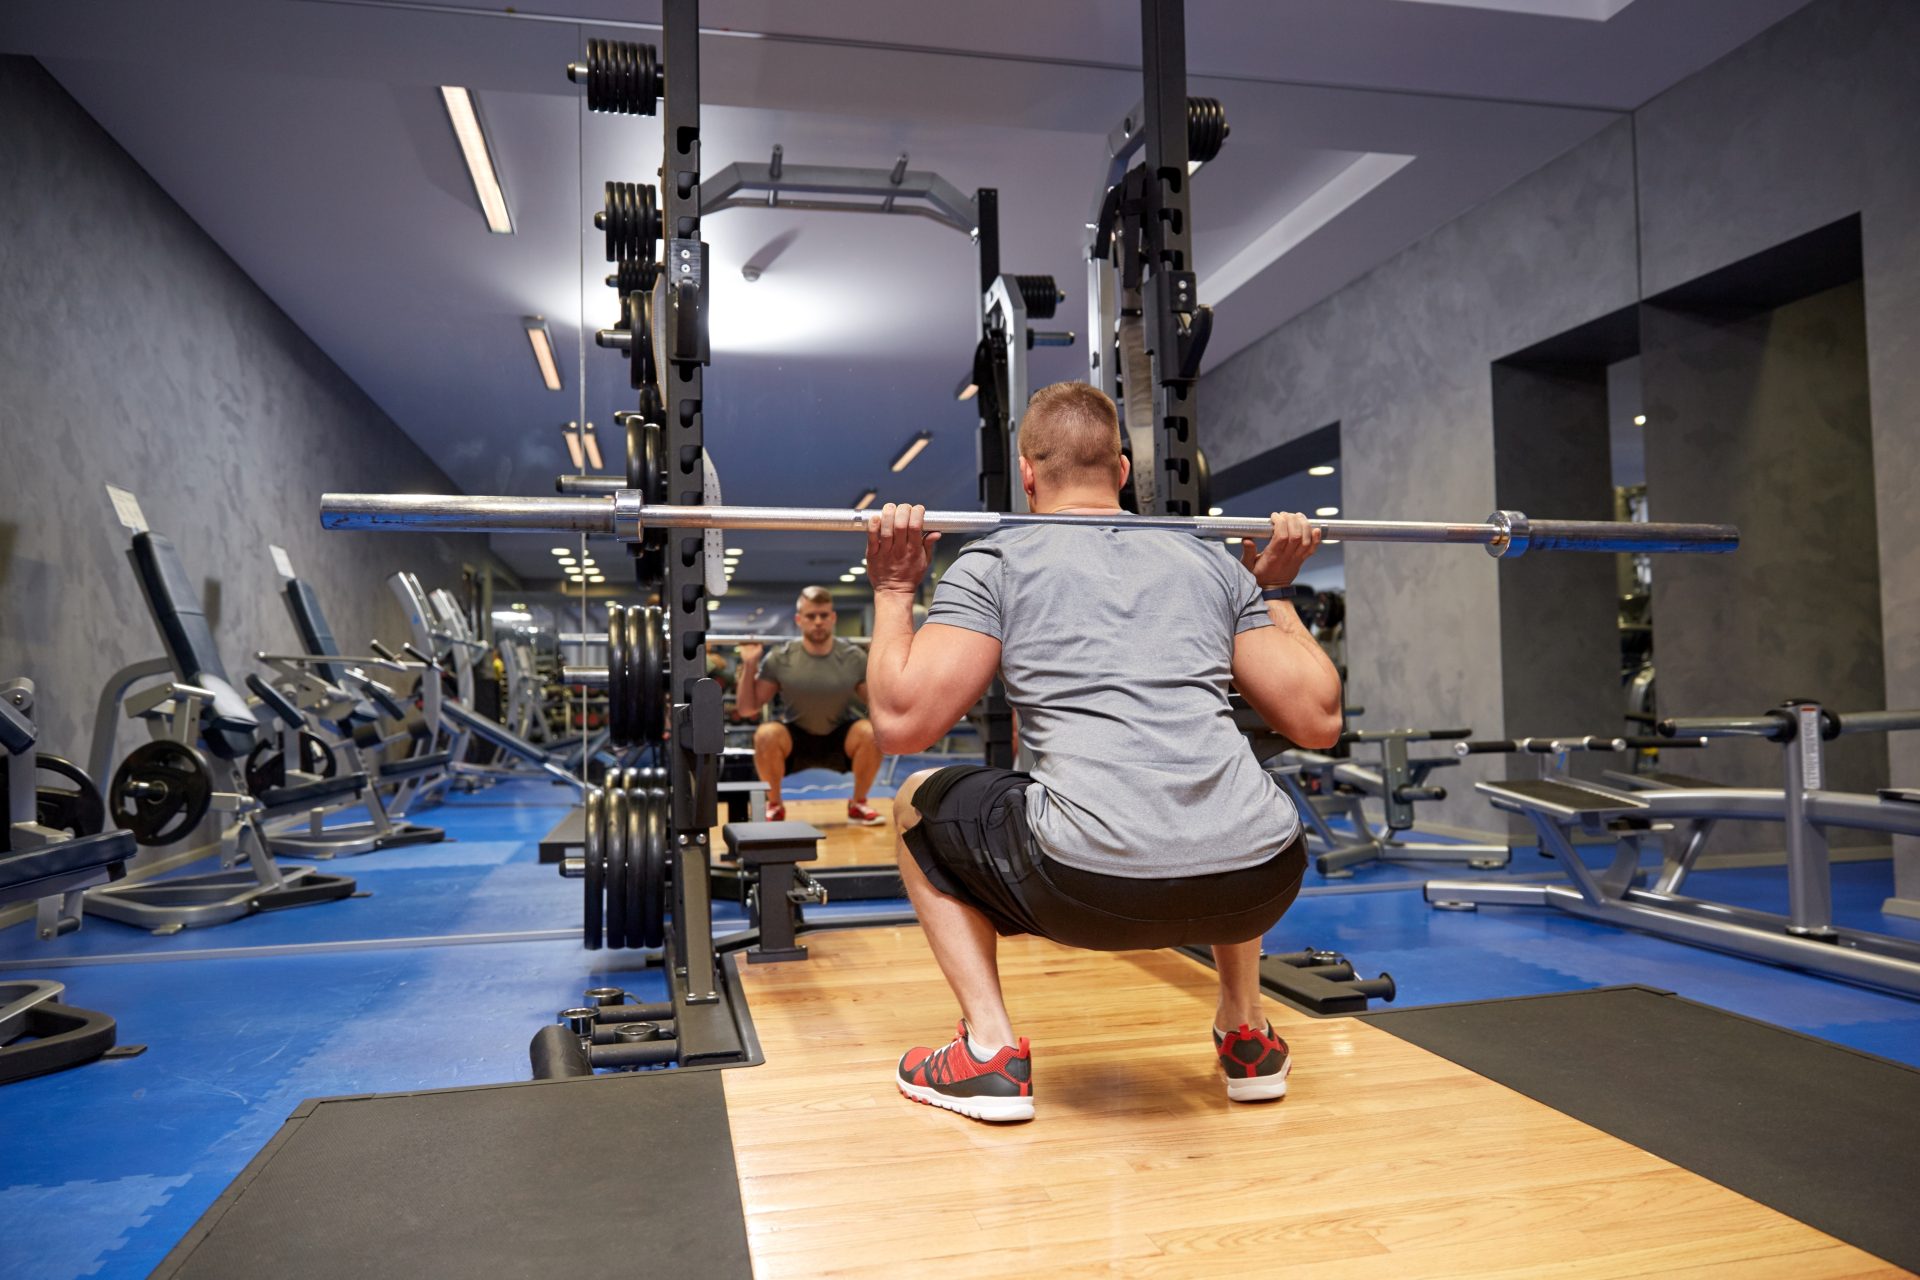
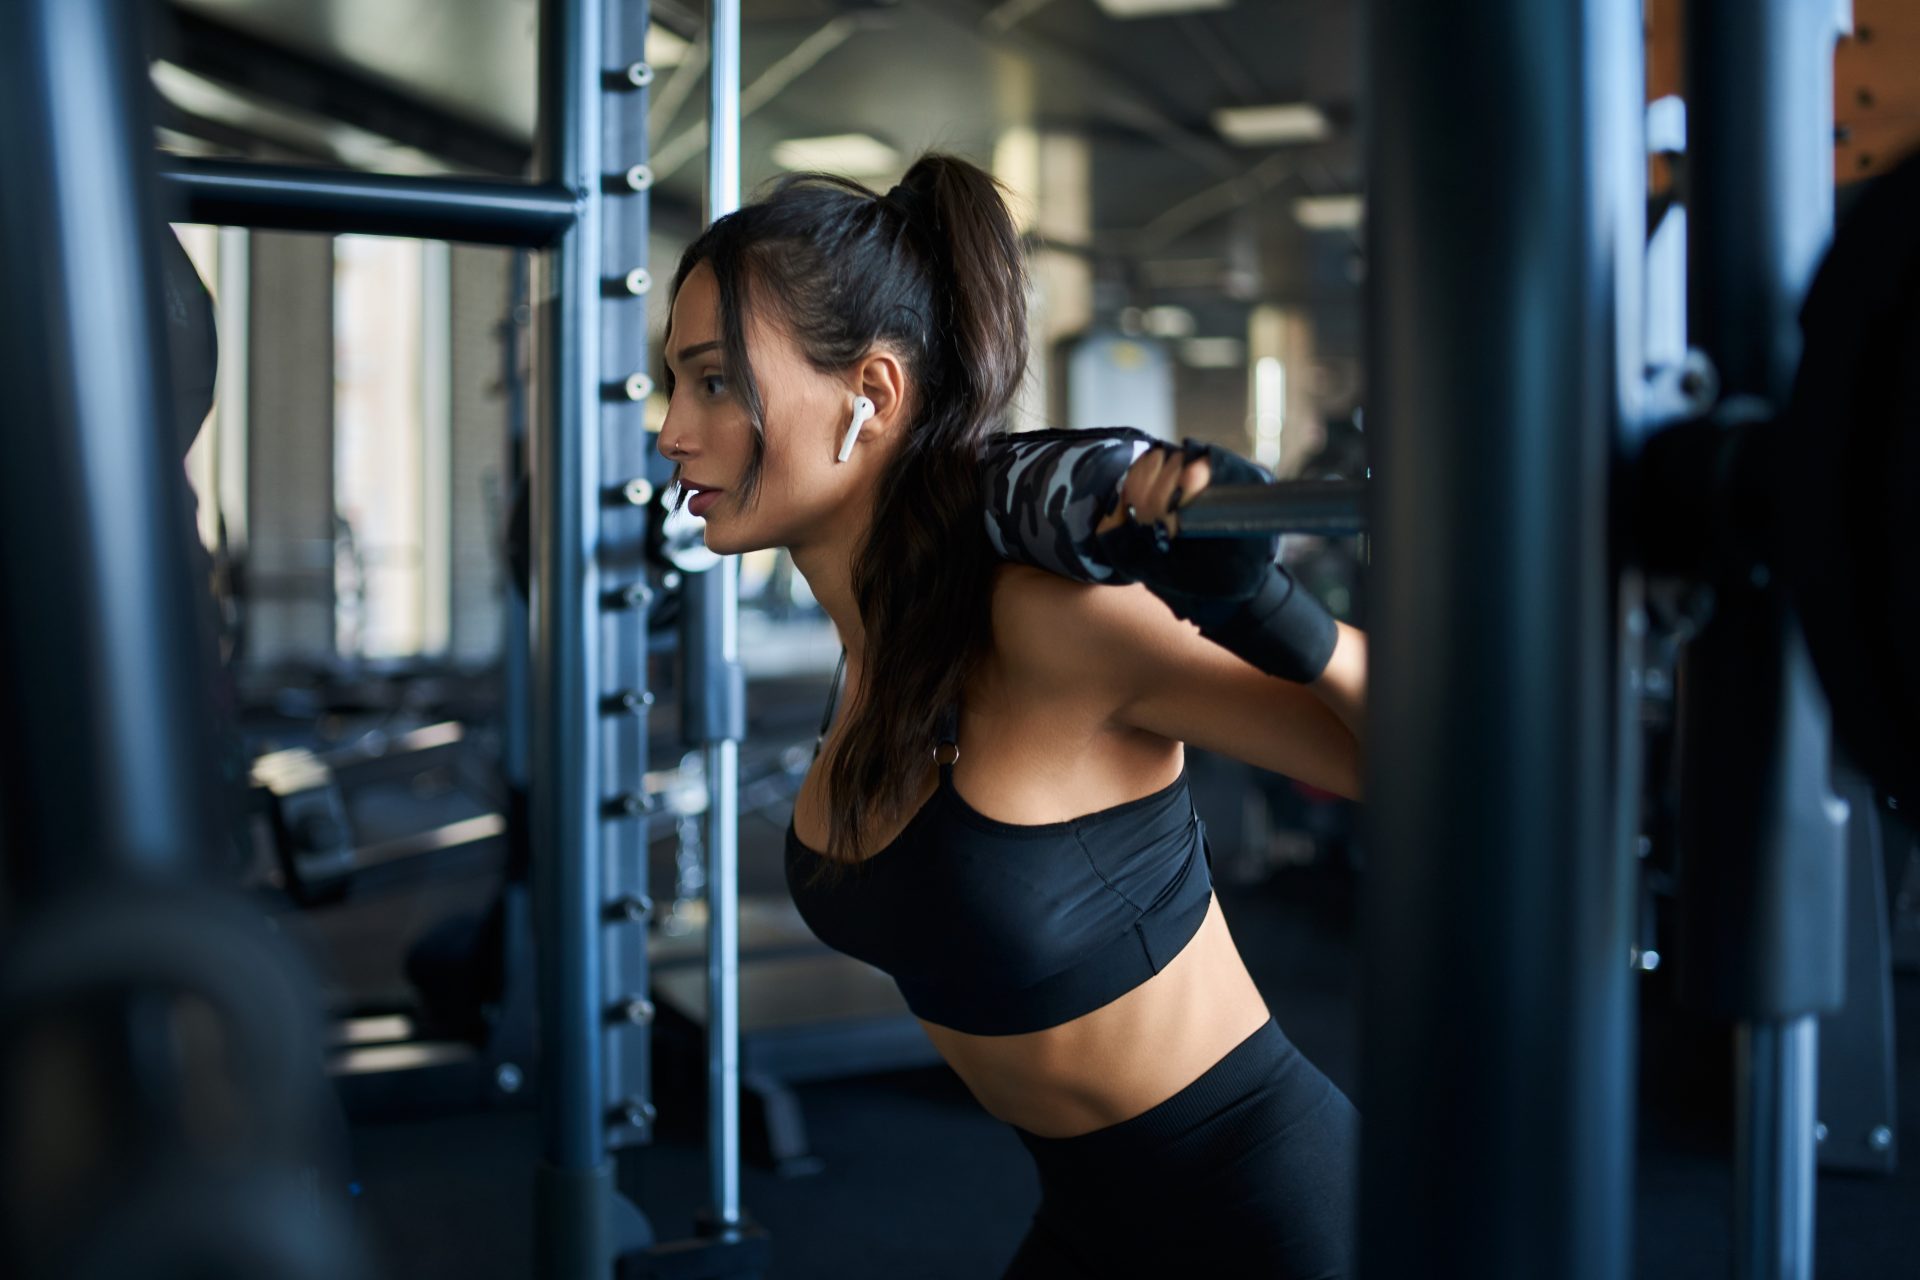
Use Squat Rack or Smith Machine

The Smith machine is a weight training equipment that consists of a barbell that is fixed within steel rails, allowing only vertical or near-vertical movement.

There are some important differences

Some people believe that a smith machine is a good option for squats because it provides support and stability for the lifter, and can be useful for those who are new to the exercise or have had injuries.

However, the Smith machine does not allow the same level of freedom of movement as a traditional squat rack, where the barbell is not fixed in place.

The main difference between squats in a squat rack and the Smith machine is the level of stability provided.

You must keep in mind that:

In a squat rack, the barbell is not fixed in place, and the lifter must use their own stability muscles to balance the weight.

This means that the lifter is required to engage more muscle groups to perform the squat, making it more challenging and potentially more effective for muscle building. On the other hand, the Smith machine provides more stability and support, which can make the squat easier, but also less effective for muscle building.

The use of squat racks to use the principles of progressive overload while strengthening or building muscles and increasing strength is an essential part of any serious weightlifting regimen.

Recent studies have shown that changes in balance and stability are improved when squats are combined with accessory exercises such as lunges or leg presses.

Don’t forget about:

You need to continue making progress with your lifts, it’s important to use this principle in combination with exercises that help improve overall performance.

Accessory exercises allow for better stabilization of joints, and more flexibility and help ensure muscles develop properly.

Therefore, use progressive overload during squats and supplement that with additional accessary exercies for improved performance.

Check this video from Jeff Nippard:

Classic Squat

The key steps involved in properly performing a squat include standing with feet shoulder-width apart, engaging your core muscles throughout the entire movement by keeping your torso upright at all times, bending at the knees while keeping them aligned over toes (not letting them go past), pushing through heels to come back up from the bottom position into starting position (while still using core muscles).

Additionally, incorporating accessory exercises such as lunges or step ups into your workouts can also help supplement squats by targeting different muscle groups while improving flexibility and coordination as well.

Try Another Techniques

To powerlift squat properly and effectively, form and technique are of utmost importance.

Even with the most advanced equipment, powerlifting can cause strain on muscles, tendons, ligaments, and joints if proper form is not used during each lift.

Front Squat

Therefore, powerlifters must devote time and effort to learning the correct posture, grip, and execution for powerlifting squats.

With a well-researched approach and dedication to developing proper form over time, powerlifters can maximize muscle activation while minimizing the risk of injury.

Once powerlifters have mastered this technique and maintain good lifting habits throughout their lifting sessions, they will be able to see incredible results from powerlifting squats in no time!

Alternatives to Classic Squat

  • Goblet Squat
  • Front Squat
  • Overhead Squat
  • Zercher Squat
  • Box Squat
  • Bulgarian Split Squat
  • Single Leg Squat (Pistol Squat)
  • Jump Squat
  • Smith Machine Squat
  • Hack Squat
  • Safety Bar Squat
  • Barbell lunge
  • Dumbbell lunge
  • Sissy Squat
  • Leg press
  • Leg Extension
  • Leg curl
  • Calf Raise
  • Step-up
  • Bulgarian split-squat
  • Lunges
  • Box jump

Adequate Rest Is Essential for Recovery & Optimal Performance Results

Finally, adequate rest is essential for recovery after every training session in order to reduce injury risk while maximizing performance gains from each workout session.

Adequate rest includes both getting enough sleep each night as well as taking regular breaks between sets so that your muscles have enough time to recover before beginning another set of reps or exercises.

It is also important to take at least one day off per week from training sessions in order for optimal recovery before continuing with another week’s worth of workouts.

Rest Enough!

One of the key aspects of recovering from a challenging squat with bar training session is ensuring adequate rest in between them.

Resting the body allows the muscles to rebuild, repair, and increase strength, which reduces the risk of injury and optimizes performance results.

Quite simply, if you don’t rest adequately, your squat with bar session will eventually become ineffective due to reaching a state of over-training.

To ensure that each squat with bar training session is worthwhile, it’s fundamental to build adequate rest into your training routine. It may seem counterintuitive to take time away from intense workouts.

However, taking time for recovery helps reduce fatigue and minimizes the potential for injuries.

As athletes strive for higher performance results, rest is essential for getting back up and squatting again soon after training.

Benefits of Incorporating Squats Into Your Workouts

Incorporating squats into your regular routine provides numerous benefits including:

  • improved overall strength and fitness levels
  • increased muscle activation
  • improved flexibility
  • enhanced coordination
  • improved posture
  • reduced injury risk due to proper form/technique
  • increased power output
  • improved balance/stability
  • enhanced endurance capabilities
  • improved cardiovascular health
  • decreased risk of developing osteoporosis due to increased bone density caused by regular physical activity involving squats
  • better joint health due to less strain put on joints during movements since they are strengthened by squats
  • plus many more!

All in all, there really isn’t anything bad about adding squats into any workout program – just make sure you’re doing them correctly!

Last Thoughts

Squats are an incredibly beneficial exercise that should be included in any workout regardless of goal or experience level due to their many benefits including increased overall strength, enhanced coordination skills, improved cardiovascular health, better joint stability plus many more!

Proper technique is key when it comes to reaping all these rewards so make sure you understand what constitutes proper form before attempting any type of squat variation so that you can maximize performance results without putting yourself at risk for injury!

Lastly don’t forget about adequate rest between sets & training days – this is essential for recovery & optimal performance results!

Try These Techniques for Improving Squat Performance

  1. Start with the basics: proper form and technique are essential for maximizing muscle activation and minimizing the risk of injury. Make sure to keep your chest up, back straight, and hips back as you lower down into the squat.
  2. Focus on progressive overload: in order to continue making progress, it’s important to consistently increase the weight you’re using or the reps you’re performing. This will put more stress on your muscles and promote adaptation.
  3. Incorporate accessory exercises: exercises like lunges, leg press, and calf raises can help to target specific muscle groups and improve overall squat performance.
  4. Get enough rest and recovery: it’s important to allow your muscles time to recover and repair after training. Adequate rest and recovery will help to reduce the risk of injury and improve your overall performance.

Final Recap

As we said, squatting is a highly effective exercise for building muscles and improving overall fitness.

By following the strength standards provided in this article, and using the techniques for improving squat performance, you can achieve your fitness goals and improve your overall strength.

Best Leather Golf Gloves – Get a Grip on Your Game!

0

Are you looking for a way to improve your golf game? Look no further than your choice of golf gloves. Golf gloves are essential for any golfer looking to improve their grip and control of the club. However, not all gloves are created equal, and finding the right one for your game can make a difference.

Leather golf gloves are the top choice for serious golfers, offering a combination of durability, comfort, and grip that other materials can’t match. This article will explore the best leather golf gloves on the market and what makes them stand out.

Whether you’re a seasoned pro or just starting, upgrading your golf glove can be a simple yet effective way to take your game to the next level.

Top 5 Picks For Leather Golf Gloves

The HERITAGE Cream/Brown Leather Golf Glove

HERITAGE CREAM : BROWN LEATHER GOLF GLOVE
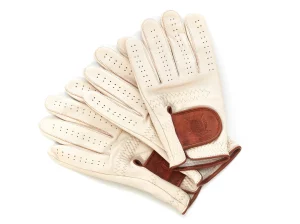
It is a masterpiece of handcraftsmanship made from high-grade Cabretta leather, known for its softness and durability. This premium golf glove is designed for style and functionality, with its cream and brown colors adding an elegant touch to your golf apparel.

Product Features:

  • Made from high-grade Cabretta leather for a soft and comfortable fit.
  • Handcrafted with attention to detail for a lasting and durable product.
  • Available in three sizes, Medium, Large, or XL, to ensure a perfect fit on any hand.
  • Available in both Right-Handed and Left-Handed versions to meet your unique needs.
  • Cream and brown colors add a touch of elegance to your golf apparel, making it stand out on the course.
  • Provides excellent grip and control of your golf club, even in wet or humid weather conditions.
  • Double-stitched seams ensure a secure fit and long-term durability.
  • Suitable for all levels of golfers, from beginners to professionals.

By choosing the HERITAGE Cream/Brown Leather Golf Glove, you choose a product that embodies high quality, functionality, and style. Perfect for any golfer looking to add a touch of luxury to their golf gear.

PRO EXECUTIVE BLACK / CREAM LEATHER GOLF GLOVE (L/H)

PRO EXECUTIVE BLACK : CREAM LEATHER GOLF GLOVE (L:H)
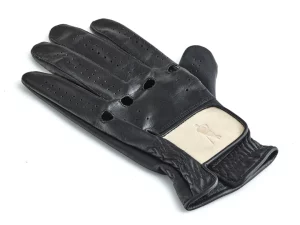
The PRO EXECUTIVE BLACK / CREAM LEATHER GOLF GLOVE (L/H) by MVP Golf Gloves is the perfect accessory for golf enthusiasts. Made from high-grade cowhide leather, this glove is built to last and provides optimum comfort during extended use. The classical design with modern appeal makes it a great addition to your golfing outfit.

Product Features:

  • Made from high-grade cowhide leather for durability.
  • Classical design with modern appeal gives it a stylish look.
  • Size available in Medium, Large, or XL for a perfect fit.
  • Optimum comfort and flexibility for improved grip and swing.
  • Perfect for golf enthusiasts who want to look stylish and feel comfortable.
  • The black and cream colorway adds a touch of elegance to any outfit.
  • Designed for left-hand use only.

Sledwise Golf Gloves Men

Sledwise Golf Gloves Men Right Handed Golfer
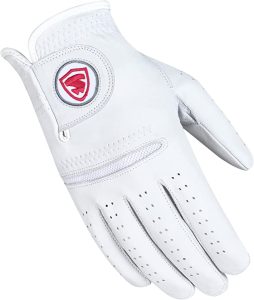
Sledwise Golf Gloves for Men are designed to enhance your grip and performance on the golf course. These gloves are made with superior-quality materials and an enhanced Velcro closure to provide a secure and comfortable fit. The soft and secure fit makes these gloves perfect for golfers of all levels.

Product Features

  • Superior grip and control on the golf course.
  • Enhanced Velcro closure for a more secure and comfortable fit.
  • Soft and secure fit for maximum comfort and grip.
  • Breathable fabric enhances ventilation and keeps your hands dry.
  • Improved design for added performance and durability.
  • Perfect for golfers of all levels.
  • Soft and durable construction ensures long-lasting use.
  • Available in different sizes to ensure the perfect fit for your hands.

Whether you’re a seasoned golfer or a beginner who wants to improve your game, Sledwise Golf Gloves for Men is a perfect choice. Try them out today and experience the difference in your game!

CaddyDaddy Claw Pro Men’s Golf Glove

CaddyDaddy Claw Pro Men’s Golf Glove
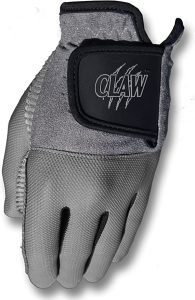
The CaddyDaddy Claw Pro Men’s Golf Glove is an excellent choice for golfers looking for added stability and superior grip on the course. This glove is well-ventilated and breathable, designed for left-handed players, and made with 100% synthetic materials that keep hands cool and sweat-free.

The Claw Pro’s unique design offers a comfortable fit that conforms to the hand for unmatched grip and control. It features a textured palm that improves grip and a reinforced thumb for added durability. This glove also includes an adjustable closure to ensure a secure fit.

Product Features:

  • Added stability and superior grip
  • Specifically designed for left-handed players
  • Well-ventilated and breathable
  • Made with 100% synthetic materials
  • Textured palm for enhanced grip
  • Reinforced thumb for added durability
  • Adjustable closure for a secure fit
  • Keeps hands cool and sweat-free

Mizuno 2020 Elite Golf Glove

Mizuno 2020 Elite Golf Glove
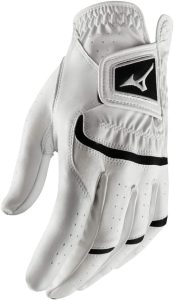
The Mizuno Elite Golf Glove is a top-notch glove for golfers striving to perfect their game. Crafted with professional-grade cabarets leather, this glove features a contoured fit for a natural feel and movement and double-stitch thumbs for added durability.

The cabarets leather palm provides exceptional grip and touch, ensuring your shots are always on point. The glove’s design also prioritizes flexibility and breathability, allowing for comfortable, unrestricted swings.

Product Features:

  • Professional-grade cabarets leather palm for superior grip and touch.
  • Contoured fit for natural feel and movement.
  • Double-stitch thumb for added durability.
  • Flexible design for free swings.
  • Breathable construction to keep hands cool and dry.
  • Available in multiple sizes for a personalized fit.
  • Ideal for golfers of all skill levels.
  • Premium materials and construction for long-lasting durability.

Benefits Of Leather Golf Gloves

Here are just a few reasons why you should consider using a leather golf glove:

Better Grip, Even In Wet Conditions

A leather golf glove provides a better grip on your club, especially in wet or humid conditions. The leather’s natural texture helps absorb moisture and prevent slipping, giving you more control over your swing and helping you hit the ball more consistently.

Improved Comfort And Durability

Leather gloves are known for their durability and long-lasting quality, making them a great investment for avid golfers. They are also soft and supple, molding to your hand over time for a comfortable fit that won’t restrict your movement or cause discomfort.

Helps Prevent Blisters And Calluses On Your Hands

Golfers often experience blisters and calluses on their hands after hours of gripping and swinging their clubs. A leather golf glove can help prevent these painful and unsightly skin conditions by providing a protective layer between your hand and the club.

This allows for a smoother and more comfortable swing without the added risk of injury or irritation.

Adds Style And Sophistication To Your Golfing Attire

A leather golf glove is not only functional but also adds a touch of style and sophistication to your golfing attire.

With various colors and designs available, you can choose a glove that matches your style and makes you stand out on the course. A well-crafted leather glove is a classic fashion accessory that will never go out of style.

Features To Look For In A Leather Golf Glove

Material

Regarding leather golf gloves, you want to ensure you get genuine, high-quality leather. Look for gloves made from Cabretta leather, a thin, soft leather known for its durability and flexibility.

Some gloves may also be made from synthetic leather, which can be a good option for those who are vegan or want a more affordable option.

Fit

The fit of your golf glove is crucial for your game. You want a glove that is tight enough.

A too-tight glove can restrict your mobility and affect your grip, while a too-loose glove can slip and cause blisters. Try on gloves and test out different sizes to find the right fit for your hand.

Design

Perforated and ventilated gloves keep your hands cool and prevent sweat from building up. Look for gloves with perforations on the palm and fingers and on the back of the hand.

Ventilation can also be important for keeping your hands dry and comfortable during long rounds.

Reinforced Stitching And Elastic Closure

You want a glove that will last through multiple rounds and hold up to the wear and tear of your swing.

Look for gloves with reinforced stitching in high-wear areas, such as the palm and fingertips. An elastic closure can also help keep the glove secure and prevent slipping off during your swing.

Wrapping Up

Finding the right golf glove is essential to take your game to the next level, and leather golf gloves are a great option for players who value comfort, durability, and a classic look. With a good leather golf glove, you can improve your club grip, reduce blistering and calluses, and play longer and more comfortably. 

Whether you are a beginner or a seasoned golfer, investing in a high-quality leather golf glove is a smart move that will pay off in terms of performance and enjoyment on the course. So, why wait? Get your grip on your game today with the best leather golf gloves available on the market!

Hex Press: Sculpt Upper Body (Workout Guide)

0

Are you ready to take your upper body training to the next level? If you want to build a strong, chiseled upper body that turns heads and boosts your confidence, then the hex press may become your new best friend in the gym. Whether you’re a seasoned fitness enthusiast or just starting your fitness journey, incorporating the hex press into your routine can yield impressive results.

In this comprehensive workout guide, we’ll dive deep into the world of the hex press and explore how this exercise can target and sculpt various muscles in your upper body. We’ll cover everything from your chest and shoulders to your triceps, providing step-by-step instructions, tips for proper form, and insights into the benefits of including the hex press in your regimen.

Understanding the Hex Press

Unlike its conventional counterpart, the chest press with dumbbells, the hex press introduces an innovative twist by employing hexagonal dumbbells instead of the standard cylindrical ones. This seemingly minor alteration gives birth to a remarkably distinct exercise that stimulates muscle growth and challenges your stabilizing muscles in novel ways.

Hex Press Muscles Worked: Chest, Shoulders, and Triceps

The triad of muscles taking center stage during a hex press workout includes the chest, shoulders, and triceps. Understanding their roles in this exercise helps emphasize its effectiveness in achieving a well-rounded upper body transformation:

Chest Muscles (Pectoralis Major): 

The hex press engages the pectoralis major muscles as you push the dumbbells upward. This muscle group plays a pivotal role in achieving that well-defined chest that exudes strength and power.

Shoulders (Deltoids): 

As you lift the hex dumbbells, your deltoid muscles, specifically the anterior deltoids, come into play. The controlled motion of the hex press activates these muscles, contributing to broad and sculpted shoulders.

Triceps: 

The triceps at the back of your upper arms play a vital role in elbow extension during the hex press. This exercise provides an excellent opportunity to enhance the definition of these muscles, contributing to overall arm aesthetics.

Essential Equipment: Hex Dumbbells and a Sturdy Bench

To embark on a journey of hex press prowess, you’ll require two key pieces of equipment: hex dumbbells and a sturdy bench. The hex dumbbells, distinct in their six-sided design, facilitate a comfortable grip and prevent rolling during the exercise. Paired with a bench, this setup ensures stability, proper form, and optimal muscle engagement.

Benefits of Incorporating Hex Press into Your Routine

Let’s dive into the step-by-step breakdown of this exercise, highlighting crucial elements such as bench setup, hand placement on the dumbbells, body posture, and range of motion. By grasping these nuances, you’ll unlock the full potential of the hex press while sidestepping common pitfalls.

Step-by-Step Hex Press Execution

  • Bench Setup: Begin by positioning a sturdy bench flat or slightly inclined. Ensure its stability before proceeding.
  • Dumbbell Selection: Select hex dumbbells that align with your fitness level. Remember that starting with a lighter weight is ideal to master the form before progressing to heavier loads.
  • Lying Down: Sit on the bench and lie down with your back firmly against it. Your feet should be planted on the ground, providing a stable base.
  • Hand Placement: Grasp the hex dumbbells with a neutral grip (palms facing each other). Position them just above your chest, with your arms forming a 90-degree angle.
  • Body Posture: Maintain a natural arch in your lower back while keeping your core engaged. This posture provides a stable foundation for the exercise.
  • Execution: Exhale as you press the dumbbells upward, extending your arms fully without locking your elbows. Keep the dumbbells aligned over your chest, maintaining control throughout the movement.
  • Range of Motion: Lower the dumbbells in a controlled manner, allowing them to reach slightly below chest level. Avoid overstretching or bouncing the weights off your chest.
  • Breathing Pattern: Inhale as you lower the dumbbells and exhale as you press them back up. This synchronized breathing enhances stability and efficiency.

Key Points for Precision and Effectiveness

  • Bench Setup: A secure and stable bench ensures proper alignment during the exercise, reducing the risk of injury.
  • Hand Placement: The neutral grip minimizes strain on the wrists and encourages balanced muscle engagement.
  • Body Posture: A neutral spine and engaged core prevent excessive strain on your lower back and enhance overall stability.
  • Range of Motion: Optimal range ensures effective muscle engagement while preventing unnecessary joint stress.
  • Stability Tips: Maintain a firm grip on the dumbbells, and avoid using momentum to lift the weights. Focus on controlled movements for maximum muscle activation.

Common Mistakes to Avoid

  • Arching Back: Overarching your lower back can lead to strain. Maintain a slight arch or a neutral spine.
  • Flaring Elbows: Keep your elbows close to your body to effectively target the intended muscle groups.
  • Excessive Weight: Starting with too much weight can compromise your form. Begin with a manageable load and progress gradually.

Creating Your Hex Press Workout Routine

Hex Press

Determine Your Frequency

  • Consider your fitness level and recovery capacity.
  • Beginners: Start with 2-3 sessions per week.
  • Intermediate to Advanced: 3-4 sessions for continued progression.

Exercise Selection and Order

  • Integrate hex press as a compound movement.
  • Begin with a hex press to capitalize on energy levels.
  • Follow with complementary exercises for the chest, shoulders, and triceps.

Sets and Reps

  • Beginners: 3-4 sets of 8-10 reps.
  • Intermediate: 4-5 sets of 6-8 reps.
  • Advanced: 5 sets of 4-6 reps for strength gains.

Rest Intervals

Sample Hex Press Workout Routine: Intermediate Level

  • Incline Hex Press: 4 sets x 8 reps
  • Incline Dumbbell Flyes: 3 sets x 10 reps
  • Seated Dumbbell Shoulder Press: 4 sets x 8 reps
  • Lateral Raises: 3 sets x 10 reps
  • Tricep Dips: 4 sets x 8 reps
  • Skull Crushers: 3 sets x 10 reps

The Benefits of Hex Press in Your Routine

Let’s explore the concrete advantages that make hex pressing a valuable asset in your fitness arsenal.

Comprehensive Muscle Engagement

The hex press is a compound movement that targets multiple muscle groups simultaneously. This comprehensive engagement translates to efficient and effective muscle development. The hex press catalyzes an aesthetically pleasing and strong upper body by enlisting the chest, shoulders, and triceps.

Enhanced Stabilization

The unique hexagonal dumbbells introduce an element of instability, requiring your stabilizing muscles to kick into action. This fosters better balance and coordination, essential for lifting and daily activities that demand stability.

Balanced Muscle Development

The hex press contributes to balanced muscle development, unlike some exercises emphasizing specific muscle groups. This is essential for aesthetics and preventing muscle imbalances that could lead to discomfort or injury.

Functional Strength

The hex press mimics natural pushing motions you encounter daily, whether pushing a door open or lifting an object. Strengthening these movement patterns enhances your functional strength, making everyday tasks easier and smoother.

Joint-Friendly Mechanics

The controlled range of motion in hex pressing makes it a joint-friendly exercise. This is particularly beneficial for individuals who want to stimulate muscle growth without subjecting their joints to unnecessary stress.

Progression Possibilities

The hex press caters to varying fitness levels. Whether a beginner or an advanced lifter, you can adjust the weight and intensity to suit your needs. This flexibility makes it a versatile exercise that grows with you.

Mind-Muscle Connection

Executing hex presses with precision demands focus. This connection between your mind and muscles enhances not only your performance but also your overall workout experience.

Aesthetic Transformation

The cumulative effect of the hex press’s muscle engagement, balanced development, and functional strength enhancement is an aesthetic transformation. It contributes to a sculpted upper body that’s visually appealing and functionally capable.

Versatility in Routine

Whether pursuing strength, aesthetics, or a combination, the hex press can seamlessly fit into your workout routine. Its adaptability allows you to use it as a core compound movement or an accessory exercise.

Hex Press

Summing Up

As we explore the hex press to a close, it’s clear that this exercise is more than just a movement; it’s a pathway to sculpting an upper body that exudes strength, symmetry, and functional prowess.

Through the detailed breakdown of its form, the unveiling of its benefits, and the comparisons with other exercises, we’ve illuminated the path to harnessing the power of the hex press in your fitness journey.

So, whether you’re a seasoned lifter seeking a new challenge or a newcomer embarking on your transformation, the hex press stands ready to propel you toward your goals. 

Cable Pullover – What Muscles Worked + HOW TO

0

Compound exercises like pull-ups, chin-ups, bent-over rows, and pulldowns are popular among bodybuilders to build a broad and muscular back. They involve lots of bicep work and can be too demanding. For this reason, many gym goers prefer isolation lat exercises for ease and thorough training of the back muscles.

A cable lat pullover is an isolation exercise that primarily focuses on the back and works the chest and abs. It is a handy exercise for building mass and defining the upper body while improving your fitness levels. Cable pullovers require only one piece of gym equipment, a cable machine. However, you must be careful when using the cable machine to prevent injuries.

This article discusses all the must-knows about cable lat pullovers and mentions a step-by-step guide on how to do cable pullovers in the easiest way possible.

Let’s get into it.

Benefits of Cable Pullovers

Lower Back Friendly

Anyone with back pain should opt for standing cable pullovers because they don’t hyperextend your spine and brace your core.

It is lower back friendly and more comfortable than most bent-over row variations.

Enhances Shoulder Flexibility

Standing cable rows is one of the best exercises that move your limbs through an extensive range of motion, improving your shoulder mobility.

Also, it helps treat tight shoulders and other pain-causing shoulder issues.

Easy to Learn

This exercise is ideal for beginners as it is easy to learn and eventually master. To enhance its efficiency, you can also add more weights.

Isolate Your Lats

This exercise doesn’t work on your biceps, so its main focus is last, which boosts the mind-muscle connection.

Cable Pullover Muscles Worked

As mentioned above, cable pullovers are an isolation exercise, primarily involving movement at just one joint. However, it also affects other important muscle groups, such as:

Latissimus dorsi

Also named lats, the Latissimus dorsi is located in the upper back and joins your arms with the torso. It is responsible for shoulder extension and medial rotation. Well-defined lats give a muscular look to the body.

Triceps brachii

Also called the triceps, this muscle group is located on the back side of the upper arm. It plays a role in shoulder extension when performing cable pullovers.

Rectus abdoimis

This lat exercise also works on your abs because the activated rectus abdoimis muscles keep your lumbar spine in place. This exercise helps stabilize your core and upper body while enhancing your core strength.

Posterior deltoid

The posterior deltoid is the rearmost shoulder muscle that supports the extension of the shoulder joint. It receives stimulation when performing cable pullovers.

How to do Lat Pullover Cable?

Learning standing cable pullovers, the conventional type of this exercise is necessary before incorporating other variations into your workout regimen.

Furthermore, you must perfect your form and arm movements to achieve proper outcomes, as they play a vital role in performing cable pullovers.

Here are step-by-step instructions on doing standing cable pullovers most effortlessly:

  • Step 1: Adjust the machine by attaching a straight bar on the highest setting.
  • Step 2: Using an overhand grip, hold the handle at shoulder-width and take two or three steps back from the machine.
  • Step 3: Next, set your feet at a distance of shoulder width apart and your back straight and slightly lean in.
  • Step 4: Without bending your elbows, bring the bar down until it adjoins your thighs. Wait at the end of the motion and clutch your lats. Keep your core engaged and chest up.
  • Step 5: Next, slowly let the cable return to the starting position while maintaining your form.
  • Step 6: Repeat the cable rope pullover as many times as you can in the 3 sets.

What are The Best Cable Pullover Alternatives and Variations?

Although cable lat pullover is an effective exercise for training your back, you don’t have to rely solely upon them. Incorporate cable pullover alternatives and variations in your workout regimen to obtain destined outcomes.

Here are the best three cable pullover alternatives and variations to keep your workouts productive:

1. Incline Cable Pullover

Angles are vital in building muscles by enhancing the potency of different exercises. The incline cable pullover hits your lats differently but still gives solid results.

Here’s how to do the incline cable pullover:

  • Put a bench in front of the cable machine at an angle of 45 degrees. Sit on the bench facing the high pulley machine with a straight bar attached.
  • Slightly raise your head and grab the handle with straight arms.
  • Draw the handle towards your thighs without curling your elbows, and repeat the exercise several times.

2. Supine Cable Pullover

People with weak lower back can opt for cable rope pullovers because it’s more comfortable and doesn’t require an excellently strong core.

Here are the instructions to do the cable role pullover:

  • Attach a straight bar to a low cable machine and bring a bench in front of it. Lie on it and pull the cable into a vertical position.
  • Slightly bend your elbows and lower your arms backward, so the biceps touch the ears.
  • Slowly bring your arms back to the starting position and repeat the exercise.

3. Kneeling Straight Arm Cable Pullover:

The significant difference between this cable pullover variation and the traditional one is that this lat exercise requires you to kneel on your knees instead of standing.

It defines your chest, back, and core while improving your upper body strength.

Here’s a summary of how to do a kneeling straight-arm cable pullover:

  • Fasten a rope to the cable machine at the highest setting and take a few steps back from the equipment.
  • Next, grab the rope handle while fully extending your arms and tightening the core.
  • Pull the rope downwards with your lats muscle only and squeeze it in once your handle touches to sides of your legs. Repeat the exercise for desirable outcomes.

Final Thoughts

We suggest you switch up your back workout routine by trying out various variations of cable pullovers in addition to the conventional standing cable rope pullover.

Building a muscular and bulky back doesn’t happen overnight. You must put in the effort and utilize effectual lats to achieve attractive large back muscles.

We assure you that following the exercises given in this article will give you visible results in just a few weeks!

4-Day Push/Pull Workout Routine

0

A push-pull workout split is a popular training style that involves the push or pull of a major muscle group based on its mechanics. It is a highly effective workout split and is convenient because it’s straightforward to keep track of. The main principle of this regimen is keeping all of your muscles engaged while using a blend of push and pull exercises.

Beginners, intermediate, and even advanced-level athletes and bodybuilders use the 4 day push/pull workout routine for bodybuilding and gaining muscle mass.

The four-day push/pull workout program is flexible because it permits an entire rest day after each active day. You can adjust the workout days according to your preference while attaining the volume required for maximum muscle hypertrophy.

This article demonstrates everything you need to know about push-pull workout programs for more significant muscle hypertrophy.

Benefits of the 4 Day Push/Pull Workout Routine

Here is a list of some of the advantages you get from incorporating the given four-day push-pull workout program into your routine:

  • Optimizes recovery time between workouts.
  • Anyone can benefit from this workout despite their experience in gym/training.
  • Trains all the major muscle groups at least two times a week.
  • Includes sufficient barbell strength lifts using various exercises.
  • Promotes a balanced physique.
  • Incorporates push pull legs routine.
  • Drives muscle growth.

4 day push/pull workout routine

4 Day Push/Pull Workout Routine Schedule

Before we discuss this workout program in detail, let’s take a look at the muscles that perform pushing and pulling movements while exhibiting this workout routine:

Push Muscle Groups:

  • Chest
  • Triceps
  • Quads
  • Calf
  • Shoulders

Pull Muscle Groups:

  • Hamstring
  • Glutes
  • Back
  • Biceps
  • Traps
  • Forearms

Push-Pull Exercises:

When formulating a 4 day push/pull workout routine, you must ensure not to mess it up because it may destroy its advantages.

However, we have devised the ideal schedule for you so you refrain from all kinds of errors.

These exercises are not complicated and give maximum results when paired together. Take a break for 2-3 minutes between each set (trusted source).

Here is a sample schedule for the 4day push/pull workout split:

Day 1: Push Day Workout A

  • Squats (3 sets x 10-15 reps)
  • Push-ups (3 sets x 10-15 reps)
  • Barbell Bench-press
  • Shoulder press (3 sets x 10-15 reps)
  • Incline bench press (3 sets x 10-15 reps)
  • Cable behind head triceps extension (3 sets x 10-15 reps)
  • Cable triceps push-down (4 sets x 10-15 reps)
  • Leg extension (3 sets x 10-15 reps)
  • Dips (3 sets x 10-15 reps)
  • Dumbbell lateral raise (4 sets x 10-15 reps)

Day 2: Rest

Take a break from working out and enjoy a relaxed day.

Day 3: Pull Day Workout A

  • Machine row (4 sets x 10-15 reps)
  • Romanian deadlift (4 sets x 10-15 reps)
  • Lat pulldown (4 sets x 10-15 reps)
  • Barbell hip thrust (4 sets x 10-15 reps)
  • Lying hamstrings curl (4 sets x 10-15 reps)
  • Lying leg raises (3 AMRAP sets)
  • Barbell curl (3 sets x 10-15 reps)
  • Pull-ups (3 sets x 10-15 reps)
  • Decline crunches (3 AMRAP sets)
  • Barbell shrugs (3 sets x 10 reps)

Day 4: Rest

Enjoy a rest day and fuel your body with healthy and high-energy foods.

Day 5: Push Day Workout B

  • Skull crusher (3 x 10)
  • Arnold press (3 x 10)
  • Parallel bar dips (3 x 10)
  • Decline bench press (3 x 10)
  • Lunges (3 x 10)
  • Squat (3 x 10)
  • Cable lateral raise (3 x 10)
  • Single-arm dumbbell extension (3 x 10)
  • Cable rope overhead triceps extension (4 sets x 10-15 reps)

Day 6: Rest

Take a day off from working out.

Day 7: Pull Day Workout B

  • Hammer curl (4 sets x 10-15 reps)
  • Walking lunges (3 x 20-30 steps)
  • Assisted wide grip pull-up (4 sets x 10-15 reps)
  • Seated leg curl (4 sets x 10-15 reps)
  • Chin-ups (3 x 10-15)
  • Cable row (3 x 10-15)
  • Dumbbell preacher curl (3 x 10-15)
  • Single-arm dumbbell row (3 x 10)

Tips for the 4-Day Push/Pull Workout Program

Here are some tips for you if you are planning to add this workout program into your training routine:

1. Add variety to your workout

Incorporating various exercises in your workout routine stimulate the muscles and avoid lethargy.

squatting

You can add variety by using differentequipment, such as barbells, dumbbells, etc. Also, you can switch barbells with dumbbells in some exercises. Adding unilateral and bilateral exercises also helps a lot.

2. Choose heavy weights

When choosing the weight for any exercise, make sure it’s heavy enough to challenge you to reach the last rep.

However, you should be able to maintain a good posture till the end with the weight.

3. Proper nutrition and sleep

You put yourself at a high risk of illness and injury without proper nutrition intake and sleep. In this way, you won’t be able to achieve your desired goal, which will only ruin your health.

Therefore, you must remain moderate in your training session and diet and supplements.

Eat nutrition-rich meals and avoid foods like:

  • Alcohol
  • Processed foods
  • Sugar

Furthermore, it is also necessary to get sufficient sleep.

Aim for 7-9 hours of sleep per night to enjoy a new day of workouts.

How Many Exercises Are Needed In A Pull Workout?

To make your pull work out practical, you must incorporate at least 3 exercises, such as:

  • One vertical pulling exercise (lat pulldowns, pull-ups, etc.)
  • One horizontal pulling movement (seated cable row, dumbbell row, etc.)
  • One activity for the hamstrings (Romanian deadlifts, leg curls, etc.)

Does the Push-Pull Workout Routine Help With Fat Loss?

A push-pull workout program is neither good nor bad for weight loss because it involves resistance training.

back workout pre-workout effects

While resistance training contributes to a calorie deficit, a calorie-deficit diet primarily helps with fat loss.

What Is the Duration of the Push-Pull Workout?

On average, a push-pull workout routine lasts 45-70 minutes, the perfect duration that helps build a more robust and bulkier body.

Final Thoughts!

Push-pull training splits push-and-pull motion for the muscles which perform the same movements.

Furthermore, this routine also trains the upper body, lower body, and core and gives a balanced physique overall. It is the perfect workout program to strengthen yourself and attain more significant muscle hypertrophy.

Make some tweaking in the schedule every week to get the best results, as your muscles may become immune to them.

Lastly, this regimen supports muscle recovery, and gym-goers of any training experience level can use it.

What to Mix With Creatine? Unleash the Power of Creatine

0

If you’re looking for the best ways to maximize the effectiveness of your creatine supplement regimen, then you’ve come to the right place. In this article, we’ll discuss some of the best things to mix with creatine so that you can get the most out of your supplement routine. We’ll look at what types of food and drinks are ideal for mixing with creatine and why these combinations may give you a better result than taking it alone. So let’s dive in and explore what to mix with creatine!

Best Creatine Supplements

What Is Creatine?

Creatine is an organic compound that can be found in certain foods like red meat or fish. It is also produced naturally in our bodies.

When taken as a supplement, it can increase energy levels in our muscles by helping to produce ATP (adenosine triphosphate).

This helps with increased performance during workouts and provides more energy for muscle growth.

What is it Used For?

Creatine is a supplement that can give athletes and bodybuilders the edge they need in their pursuit of peak physical performance.

When taken regularly, creatine provides several benefits such as increased energy during exercise, improved recovery time, and enhanced muscle mass. A potential little-known benefit of creatine is taking it before bedtime to boost nighttime muscular repair.

Doing so can help individuals get the restorative quality rest that they need to continue training hard and reach new heights in performance.

Whether you’re a competitive athlete or simply trying to reach your own fitness goals, creatine could be a great supplement to reach your goals!

what to mix with creatine

Benefits Of Using Creatine

Creatine has been shown to have numerous benefits for athletes and bodybuilders alike.

Studies have shown that taking creatine can help improve strength during workouts, increase muscular endurance, reduce fatigue after exercise, improve recovery time between sets, enhance post-workout muscle growth, increase power output during explosive movements like sprinting or jumping.

It can even reduce soreness after exercise. Additionally, taking creatine may also help to reduce body fat percentage as well as improve overall health markers such as cholesterol levels.

How to Use it?

Unflavored creatine powder is very versatile. It can be combined with any liquid of choice to create the desired flavor.

Popular options are water, juice, and protein shakes.

Generally, what you should avoid is mixing creatine powder with caffeine-containing beverages such as coffee or colas, which works against the purpose of taking it in the first place. Your workouts won’t be as effective if you consume these types of energy drinks before exercising.

It’s also recommended to limit intake of alcohol when taking creatine mainly because it can interfere with increased muscle development.

Creatine can be mixed with a variety of different liquids or other supplements.

Some most used options include:

  • Water
  • Milk
  • Juice
  • Protein shakes
  • Carbohydrate-containing food (oats with banana)


Types of Creatine Available

There are two main types of creatine available on the market today – unflavored creatine powder and Creatine HCL (hydrochloride).

Unflavored creatine powder is the most popular form of supplementing with this compound because it is affordable and easy to consume through mixing with water or other ingredients such as oatmeal or protein shakes.

Creatine HCL is a newer form of supplementation that claims to be more easily absorbed by the body than traditional creatine powder but comes at a higher cost due to its patented formula.

Creatine Hydrochloride (HCL)

Creatine hydrochloride (HCL) offers a unique form of creatine which has been shown to rapidly increase strength and endurance during physical exercise (trusted source).

Unlike other forms of creatine that are often consumed through dietary supplements, HCL can be added to pre-workout drinks or even mixed with other amino acid-rich beverages such as milk.

This combination allows athletes and active individuals to take advantage of the effects of creatine without additional pill intake or the hassle of having to combine multiple powders when creating their own pre-workout drink.

It is also much easier for people on a hectic schedule who need something quick and effective before working out. All in all, HCL is an excellent alternative form of creatine that provides many benefits while taking up less time.

Proper Dosage

When consuming creatine, it is important to keep the proper dosage instructions and scheduled timing.

Taking too much or taking it at the wrong time can limit its effectiveness.

Furthermore, one should consider any potential interactions that might occur when mixing creatine with other supplements and medications.

Unforeseen risks of taking certain combinations of substances include adverse side effects such as nausea, bloating, or cramps. Therefore, it is always best to be mindful of supplement safety precautions and inform your doctor before combining different substances in your diet or workout routine.

What to Mix With Creatine – Experiment More

Experimentation is key to finding the best way to use any supplement, especially when it comes to one of the most popular options available.

Everyone has individual needs and preferences when it comes to achieving their desired health outcomes, and trying different combinations of doses and usage times can help determine these unique requirements.

Everyone reacts differently to any given supplement due to factors such as lifestyle, age, body type and medical history, so there is no one-size-fits-all solution.

Experimentation is essential to finding the right mix for you.

Conclusion

Adding creatine into your workout routine can provide numerous benefits for athletes and bodybuilders including:

  • increased strength during workouts
  • improved recovery time between sets
  • enhanced post-workout muscle growth
  • increased power output during explosive movements like sprinting or jumping
  • reduced fatigue after exercise
  • reduced soreness after exercise

As we said, there are two main forms of supplementation available on the market today – unflavored creatine powder which is affordable yet difficult to mix into liquids or food items or creatine HCL which claims greater absorption but comes at a greater cost due to its patented formula.

Ultimately experimentation will be key in finding the right combination for your individual preferences when it comes to using creatine effectively so take your time when researching which type would be best for you!


Tricep Medial Head Exercises – All You Need To Know

0

Are you tired of your triceps not looking as toned as you want them to? Do you want to add more shape and definition to your upper arms? If so, then you need to start incorporating targeted tricep exercises into your workout routine.

The tricep muscle is located at the back of the upper arm and is responsible for arm extension and elbow stability. While many exercises work the triceps, it’s important to include exercises that isolate the medial head. This area of the tricep muscle gives the arm its “horseshoe” shape and is often overlooked in traditional tricep exercises.

If you’re looking to build bigger, stronger, and more defined triceps, then including exercises that target the medial head is a must. Not only will these exercises add more shape to your arms but they’ll also help increase overall arm strength. In this article, we’ll be diving into the best tricep medial head exercises that you can incorporate into your workout routine to help you achieve your desired results.

Understanding The Tricep Muscle

The tricep muscle is composed of three heads: the long head, lateral head, and medial head. The long head runs along the back of the arm, starting at the scapula and connecting to the elbow. The lateral head is located on the outer portion of the arm, and the medial head is located on the inner portion of the arm, closest to the body.

The medial head of the tricep plays a significant role in arm extension, particularly during exercises that require the arms to be held close to the body, such as push-ups or dips. This head is also crucial for tricep development and achieving a well-rounded arm appearance.

While the medial head is often neglected in tricep training, it is essential to train all three heads for optimal arm development. Neglecting any one of the heads can lead to imbalances in arm strength and size.

Top Tricep Medial Head Exercises

Tricep Medial Head Exercises

Exercise 1: Close-Grip Bench Press

The close-grip bench press is an excellent exercise for targeting the medial head of the tricep. To perform this exercise, follow these steps:

  • Lie on a flat bench with your feet firmly on the ground and your back pressed against the bench.
  • Grip the barbell with your hands shoulder-width apart, keeping your elbows tucked in close to your body.
  • Lower the bar down to your chest, keeping your elbows in and your wrists straight.
  • Push the bar back up to the starting position, extending your arms fully.
  • Repeat for the desired number of repetitions.

Exercise 2: Overhead Tricep Extension

The overhead tricep extension targets the medial head of the tricep and the long head. To perform this exercise, follow these steps:

  • Stand with your feet shoulder-width apart, holding a dumbbell with both hands behind your head.
  • Keep your elbows close to your head and your upper arms stationary, as you lower the weight down behind your head.
  • Raise the weight back to the starting position, fully extending your arms.
  • Repeat for the desired number of repetitions.

Exercise 3: Reverse Grip Tricep Pushdown

The reverse grip tricep pushdown targets the medial head of the tricep and the lateral head. To perform this exercise:

  • Stand facing a cable machine with a rope attachment.
  • Grip the rope with your palms facing up, and your hands shoulder-width apart.
  • Keeping your elbows tucked in close to your body, push the rope down until your arms are fully extended.
  • Slowly release the rope back up to the starting position.
  • Repeat for the desired number of repetitions.

Tricep Medial Head Exercises

Exercise 4: Skullcrushers

Skullcrushers, also known as lying tricep extensions, are another effective exercise for targeting the medial head of the tricep. To perform this exercise:

  • Lie on a flat bench with your feet firmly on the ground and your back pressed against the bench.
  • Hold a barbell or dumbbell with your arms extended straight up over your chest.
  • Lower the weight down towards your forehead, bending your elbows and keeping your upper arms stationary.
  • Raise the weight back to the starting position, fully extending your arms.

Exercise 5: Cable Rope Overhead Extension

Cable rope overhead extensions are another great exercise for targeting the medial head of the tricep. To perform this exercise:

  • Attach a rope to the top pulley of a cable machine and grasp the rope with both hands.
  • Stand with your back facing the machine and your feet shoulder-width apart.
  • Extend your arms overhead, keeping your elbows close to your head.
  • Lower the rope down behind your head, then raise it back up to the starting position.
  • Make sure to keep your elbows close to your head throughout the movement to ensure that the medial head of the tricep is being targeted.

Exercise 6: Diamond Push-Ups

Diamond push-ups are bodyweight exercises that can be done anywhere and are highly effective for targeting the tricep muscles, including the medial head. To perform this exercise:

  • Get into a push-up position with your hands close together, forming a diamond shape with your thumbs and index fingers.
  • Lower your body towards the ground, keeping your elbows close to your sides.
  • Pause briefly at the bottom, then push back up to the starting position.
  • Make sure to keep your elbows close to your sides throughout the movement to ensure that the medial head of the tricep is being targeted.

How To Incorporate These Exercises Into Your Workout

To effectively target the medial head of the tricep, it’s important to include a variety of exercises in your workout routine. Aim to include 2-3 exercises that specifically target the tricep medial head in each workout.

Here’s an example tricep workout that incorporates some of the exercises discussed:

  • Warm-up: 5-10 minutes of light cardio or stretching
  • Close-grip bench press: 3 sets of 8-12 reps
  • Overhead tricep extension: 3 sets of 10-15 reps
  • Skullcrushers: 3 sets of 8-12 reps
  • Cable rope overhead extension: 3 sets of 10-15 reps
  • Diamond push-ups: 3 sets of 8-12 reps

REST FOR 60-90 SECONDS BETWEEN EACH SET AND EXERCISE.

Tips On Proper Form And Executing The Tricep Medial Head Exercises Safely And Effectively

1. Warm Up Before Exercising

It’s crucial to warm up your muscles before performing any workout. This can be achieved through a few minutes of light cardio or dynamic stretching. A warm-up increases blood flow to the muscles and prepares them for the workout, reducing the risk of injury.

2. Choose The Right Weights And Equipment

Select weights and equipment that you can handle without compromising form. This ensures an effective workout without straining or injuring yourself. Start with lighter weights and increase as you progress.

3. Maintain Proper Posture And Form

When performing tricep medial head exercises, it’s important to maintain proper posture and form. Keep your back straight, shoulders relaxed, and elbows close to your sides. Avoid swinging your arms or bending your wrists.

4. Focus On The Contraction

To properly work the medial tricep head, it’s essential to focus on the contraction. Squeeze your triceps as you extend your arms, holding for a few seconds before lowering the weights. This maximizes muscle activation and promotes growth.

5. Don’t Forget To Breathe

Breathing is often overlooked, but it’s crucial during exercise. Inhale during the lowering phase and exhale during the lifting phase. This ensures sufficient oxygen supply to your muscles and helps you power through your workout.

6. Stretch After Exercising

After your workout, take a few minutes to stretch your triceps and other surrounding muscles. This helps reduce post-workout soreness and promotes flexibility. Hold each stretch for at least 20 seconds and repeat on both sides.

Wrapping Up

Training the medial head of the tricep is an essential component of any arms training routine. Incorporating exercises like close-grip bench presses, overhead tricep extensions, reverse grip tricep pushdowns, skull crushers, cable rope overhead extensions, and diamond push-ups can help you effectively target this muscle group and achieve greater overall arm development. Remember to focus on form and gradually increase weight and reps over time to see progress.

Tyreek Hill’s Workout Routine – All You Need To Know

0

You should definitely look at Tyreek Hill’s workout routine to get fit and enjoy yourself at the same time.

This NFL superstar’s routine will help you lose weight, build muscle, and improve your cardiovascular fitness.

This article will show you a routine that will help you bulk up and get toned. The famous bodybuilder and fitness model Tyreek Hill designed this workout routine. The routine consists of five different exercises that will target your entire body.

The Tyreek Hill Workout Routine

Tyreek Hill’s workout routine consists of various cardio and resistance exercises to help you lose weight and build muscle.

The cardio portion of the workout includes light joggers, elliptical machines, and treadmill workouts. The resistance exercises include weightlifting, barbells, and dumbbells.

Steps to The Tyreek Hill Workout Routine

  • Step 1, Warm Up: Warm up by running for 5 minutes. Then, move on to your main workout of the day, a series of plyometric jumps. Start with a jumping jack and then do ten pushups. Then, move on to jumping jacks and repeat this sequence three times.
  • Step 2, Plyometric Jumps: Plyometric jumps are an excellent way to work your legs and explosiveness. Do these for 15 minutes. You can also do them on a football or basketball court if you don’t have access to a park or soccer field.
  • Step 3, Jump Rope Workout: Jump rope is another great way to work on explosiveness, speed, and coordination skills while also burning tons of calories in under 30 minutes. Setting up two ropes side by side is a smart way to accomplish this. So they’re about 2 feet apart; each person jumps over one rope while lunges on the other side. If you want more variety in your workout routine, try changing which foot you’re jumping over or jumping over a single rope while doing lunges on the other side. This will help you build strength in your legs and improve coordination and balance.
  • Step 4, Sprinting Workout: This is one of my favorite workouts with soccer players because it’s fast-paced and helps them improve their speed on the field. To start, have everyone pair up with someone with similar fitness levels (or better) to push each other to work harder.

The Best Exercises for the Tyreek Hill Workout Routine

In this Tyreek Hill workout routine, you’ll use some of the best exercises to tone your abdominal muscles.

These exercises will compress and minimize your stomach. These exercises will also help tone your lower back, glutes, and thighs.

For this Tyreek Hill workout routine, you’ll need a mat or floor space that you can work out on.

You’ll also want to have some weights or resistance bands available. Please see a certified personal trainer for guidance if you’re unfamiliar with how to do these exercises.

  • Crunch: Sit with your knees bent and feet flat on the floor, shoulders pulled back and down. As you crunch up towards the sky, brace your abs by engaging your core muscles. Hold for two seconds before slowly lowering back down to the starting position.
  • Plank: Start sitting with your feet flat on the floor and shoulder-width apart. Press the ground behind your head to assume a plank position. Hold for 2 seconds, then lower to start.
  • Reverse Crunch: Lie on your back with your knees bent and feet flat on the floor. Place your hands on your stomach, then lift your chest and shoulders off the ground. Use your abs to crunch up towards the sky, then slowly lower yourself back down to the starting position.
  • Side Plank: Start in a standing position with feet hip-width apart and arms at your sides. Place one hand on a wall for support, then lift your other leg and place it beside your Support hand. Hold for two seconds, then lower to start.
  • Oblique Crunch: Lie facedown on the ground with both legs bent 90 degrees and arms parallel to the ground. Dig your heels into the ground as you curl your torso toward the thighs; use your abs to crunch up towards the sky, then slowly lower yourself back down to the starting position.

Check also Tom Hardy Workout Plan – Bronson, Warrion And Bane

Tyreek Hill Neck

The Tyreek Hill Neck is a small, but highly-important neck that connects the vertebrae of the human spine. It’s located between C1 and C2 and is named for former Chiefs running back Tyreek Hill.

The Tyreek Hill Neck has several functions. First, it provides support for the spinal cord. Second, it allows blood vessels to travel from vertebrae to vertebrae. Third, it helps transfer nutrients from one vertebra to another.

This area of the human body is also vulnerable to injury because of its proximity to areas that are frequently injured during athletic competitions—like the head and neck region.

Tyreek Hill’s Weight and Height

Tyreek Hill weighs 202 pounds and stands 6’0″. He reportedly benches press 350 pounds and squats 525 pounds. His vertical jump is 38 inches.

His body fat percentage is currently unknown, but it should be noted that he has maintained a muscular physique despite being fairly lean. His weight and height are both incredibly impressive for an NFL wide receiver.

Tyreek Hill’s hamstring workout

The hamstring workout routine for running back Tyreek Hill includes supersets and compound exercises.

Supersets are a great way to target multiple muscles at once, and compound exercises are the best type of exercise because they work for multiple muscle groups simultaneously.

For this hamstring workout routine,Tyreek Hill will perform three sets of supersets with 12-15 reps each:

  • Superset #1: Dumbbell Hamstring Curl x 12-15 reps
  • Superset #2: Cable Crossover hamstring raise x 12-15 reps
  • Superset #3: Glute Bridge Hamstring Curl x 12-15 reps Tyreek Hill’s hamstring workout routine is designed to improve strength and flexibility in the hamstring It is important to note that this routine is not a replacement for a prescribed hamstring rehab program. Always consult with your doctor before starting any exercise regimen.

The Tyreek Hill 200m time

Tyreek Hill holds the world record in the 200m sprint at 20.31 seconds of time.

He is also an international athlete, competing in the World Athletics Championships in London and the Summer Olympics in Rio.

Hill won gold at the 2012 London Olympics in the 200m sprint, beating Usain Bolt and Asafa Powell.

He set a world record and improved his previous 19.33 seconds by 0.15 seconds, which was enough to earn him his first-ever Olympic gold medal. He also won silver medals at the 2011 World Championships and the 2015 World Athletics Championship.

Hill has been on several teams, including Oklahoma State University and Auburn University.

Conclusion

If you’re looking for a summer workout routine to help tone your body, Tyreek Hill has you covered.

The Chiefs’ wide receiver is known for his explosive speed and powerful running style, so incorporating some of his workouts into your routine can help you achieve the desired results in record time.

In this Tyreek Hill’s article you can get started, and see how quickly your body starts to change for the better.

Best Ankle Braces for Basketball: Protect Your Ankles

0

Basketball is an intense sport that involves a lot of quick movements and sudden stops. While it is an incredibly fun activity, it is also one that can be hard on your body. One of the most commonly injured areas in basketball is the ankle. Have you ever sprained your ankle while playing basketball? Ankle injuries are so frequent in basketball that players often wear ankle braces or tape for added support. With so many options available, it can be overwhelming to decide which ankle brace would work best for you.

After all, there is no one-size-fits-all when it comes to ankle protection for this high-impact sport.

Best Ankle Braces for Basketball

If you’re looking to protect your ankles during basketball games, it’s critical to choose the right kind of ankle brace.

Not all ankle braces are created equal, and some may offer more support and protection than others. In this article, we’ll go over the best ankle braces for basketball to keep your ankles safe while you play hard and also a list of some best basketball shoes for ankle braces.

Understanding Ankle Injuries In Basketball

Ankle injuries, such as sprains and strains, are among the most prevalent injuries in basketball. The sudden changes in direction, frequent jumping, and quick stops and starts put immense strain on the ankles, making them vulnerable to injury.

These injuries can range from mild to severe and often result in pain, swelling, and limited mobility.

The impact of ankle injuries goes beyond physical discomfort.

Players with ankle injuries may experience decreased performance, reduced playing time, and increased risk of re-injury. This is where ankle braces come into play.

They provide stability, compression, and support to the ankle joint, reducing the chances of injury and aiding in the recovery process.

Factors To Consider When Choosing Ankle Braces

When selecting an ankle brace for basketball, several factors should be taken into account:

  • Level of Support Required: The severity of ankle instability or past injuries will determine the level of support needed. Ankle braces are categorized as mild, moderate, or high support braces, depending on the amount of stability provided.
  • Material and Design Considerations: Ankle braces are typically made of materials like neoprene, fabric, or a combination of both. The design should allow for breathability, flexibility, and ease of movement without compromising support.
  • Comfort and Fit: Ankle braces should fit snugly without causing discomfort or limiting circulation. Adjustable straps or laces can help achieve a customized fit for individual preferences.
  • Durability and Longevity: Look for ankle braces that are made from durable materials and have a reputation for long-lasting performance. This ensures that the braces can withstand the demands of rigorous basketball play over time.
  • User Reviews and Recommendations: It is essential to consider the experiences and feedback of other basketball players. User reviews can provide valuable insights into the effectiveness, comfort, and overall satisfaction with a particular ankle brace.

Top Picks: Best Ankle Braces For Basketball

McDavid 195 Ankle Brace

McDavid 195 Ankle BraceThe McDavid 195 Ankle Brace is a popular choice among basketball players due to its exceptional support and protection. It features a lightweight and breathable design that allows for a comfortable fit without compromising mobility.

The figure-6 strapping system ensures excellent stability, reducing the risk of ankle rollovers. The brace also provides compression and offers adjustable straps for a customizable fit.

Nike Pro Combat Ankle Sleeve

Nike Pro Combat Ankle SleeveThe Nike Pro Combat Ankle Sleeve is a lightweight and flexible option that provides compression and support to the ankle joint. It utilizes Nike’s Dri-FIT technology, which wicks away moisture to keep your foot dry and comfortable during intense games.

The anatomical design ensures a snug fit and promotes natural movement. While not as rigid as other braces, it offers adequate support for players looking for a less restrictive option.

Bauerfeind Sports Ankle Support

Bauerfeind Sports Ankle SupportDesigned with the athlete in mind, the Bauerfeind Sports Ankle Support offers a combination of compression, stability, and comfort. This brace features air knitted fabric that provides medical-grade compression to improve blood flow and reduce swelling.

The figure-8 strap system ensures optimal support and stabilization, making it an excellent choice for preventing ankle injuries. The lightweight and breathable material offers all-day comfort for long basketball sessions.

Shock Doctor Ankle Brace

Shock Doctor Ankle BraceThis ankle brace from Shock Doctor features a low-profile design with a close-to-skin fit for comfortable wear. Its X-Fit strap system allows for adjustable support, and its breathable materials keep your feet cool and dry. Customers rave about its effectiveness in providing ankle stability and reducing the risk of injury during games.

best ankle braces for basketball

Zamst A2-DX Ankle Brace

Zamst A2-DX Ankle Brace

The Zamst A2-DX Ankle Brace is a top-tier option that offers maximum support and protection for basketball players. This brace utilizes Exo-Grid technology, which delivers precise lateral and medial stability to prevent sprains.

It features adjustable straps and an anatomical design that provides a comfortable fit and restricts excessive movement. The Zamst A2-DX is a top choice for those who require maximum support due to previous ankle injuries.

ASO Ankle Stabilizer

ASO Ankle StabilizerRenowned for its exceptional durability and support, the ASO Ankle Stabilizer is a favorite among athletes in various sports, including basketball. Its bilateral design and sturdy laces offer excellent ankle stabilization.

The ballistic nylon construction provides long-lasting durability, making it suitable for intense basketball sessions. The low-profile design allows for easy fitting into basketball shoes, ensuring minimal interference with your performance.

Best Basketball Shoes For Ankle Braces

While it’s important to note that individual preferences and fit can vary, here is a list of basketball shoes that are often recommended for their ankle support and compatibility with ankle braces:

  • Nike LeBron 18
  • Under Armour Curry 8
  • Adidas D.O.N. Issue #3
  • Reebok Question Mid
  • Jordan Why Not Zer0.4
  • Puma Clyde All-Pro
  • New Balance Kawhi Leonard 1
  • Anta KT5
  • Li-Ning Way of Wade 9
  • Converse Chuck Taylor All-Star Pro

These shoes are known for their stability, cushioning, and ankle support features, making them suitable for use with ankle braces. However, it’s always a good idea to try them on and ensure proper fit and comfort before making a final decision.

Additional Tips for Ankle Injury Prevention

Apart from using ankle braces, there are other measures basketball players can take to prevent ankle injuries:

  • Proper Warm-up and Stretching Exercises: Engage in dynamic warm-up routines and perform ankle-specific stretches to improve flexibility and increase blood flow to the muscles.
  • Strengthening Exercises for Ankle Stability: Include exercises that target the ankle and surrounding muscles to improve stability and proprioception.
  • Correct Footwear and Shoe Fitting: Wear basketball shoes that provide adequate ankle support and ensure a proper fit to minimize the risk of injury.
  • Maintaining Good Court Conditions: Avoid playing on uneven or slippery surfaces, and report any hazards that could increase the likelihood of ankle injuries.

best ankle braces for basketball

Conclusion

Protecting your ankles is crucial for maintaining performance and preventing injuries in basketball. Ankle braces offer valuable support and stability, allowing players to move with confidence and reduce the risk of sprains and strains.

By considering factors such as the level of support, materials, comfort, and user reviews, you can find the best ankle brace that suits your needs and preferences.

Remember, prioritizing ankle health and safety should be a top priority for every basketball player.


How Old Do You Have To Be To Go To The Gym?

0

Children’s-friendly gyms are a great investment because they create a space where the whole family can stay active and fit. For a while, childhood obesity was a significant problem, but the statistics have stabilized in recent years. According to the Robert Wood Johnson Foundation, “the obesity rate among U.S. youth ages 2 to 19 has held steady at 17% since 2003-2004.” The widespread reform in public education and schools is credited with this change.Families are discovering that they are happier and healthier as a unit when they move together! Researchers discovered a connection between mother and child activity levels, in addition to the fact that it fosters quality time spent together that is enjoyable and engaging. Having your kids with you at the gym, whether they’re in a care program or lifting weights alongside you, significantly lowers the barrier for adults trying to meet their daily exercise goals.

Speak with your doctor before enrolling your child in a gym or exercise program because the facility may demand a physical examination and clearance.

Find a Gym That’s Kid-Friendly

Call the gyms in your area or look at their websites to find out which ones do allow kids.

Most gyms restrict access to the weight room and gym floor until around age 13, though some might let you in earlier if you’re with a parent or other registered adult.

Your child can schedule a tour to get to know the staff, check out fitness classes, and learn proper gym behavior. Make sure to ask about family discounts.

Alternately, a lot of local gyms and recreation centers provide age-appropriate group or organized classes.

To learn more about the kid and teen programs they offer, get in touch with them. With your kids, go over the options to find out what pursuits they might be interested in.

Gym Amenities

If you and the gym agree to let your child join, make sure the facility complies with safety standards.

  • Trainers and staff should be trained to work with children and have relevant experience.
  • programming geared toward children and teenagers.
  • Children should be taught how to use exercise equipment properly and safely.
  • It should be necessary to be under staff or parental supervision.
  • Children don’t use heavy weight machines or other dangerous equipment.
  • Family-friendly environment

Joining a gym can be a great way for a teen to stay physically active because more and more schools are eliminating physical education classes.

Teens who want to stay fit should engage in 60 minutes of physical activity each day in addition to eating well.

Teens are welcome to join many gyms as long as they have their guardian’s consent and the guardian pays the membership fees.

Types Of Gyms

Teen-friendly gyms can be classified as either community or private. Community gyms are frequently nonprofit establishments run by religious or other civic groups.

Nonprofit organizations, like the YMCA, charge nominal membership or usage fees. Prices at for-profit private gyms are higher than at nonprofit facilities.

Both gyms typically ask you to sign a membership contract and provide a brief health history.

Most private gyms accept both teens and adults, but a few specialized gyms only accept teenagers. More one-on-one instruction is provided in these gyms to ensure that the teenagers use the equipment safely.

Age Limitations

The age restrictions at different gyms vary. Some national chains, permit minors ages 12 to 17 to join, while others only allow those who are at least 18 years old.

Teens can work out in specific youth facility areas only in some gyms, but they are free to use the same equipment as adults in other gyms.

Depending on the gym, you might have to sign in with an adult or you might be allowed to come and go without one.

In addition to gym some facilities provide classes and programs designed especially for teenagers, enabling them to participate in group activities like dodgeball, hip-hop aerobics, and yoga.

Many gyms offer summer programs that include organized activities, games, and lessons on physical fitness.

For teenagers between the ages of 13 and 18, some gyms offer weight-loss classes that include a nutritional plan. Teenagers who are interested in team sports can compete in basketball, swimming, or even gymnastics at community gyms.

Before joining a gym and beginning a new fitness regime, a teen should have a physical exam with his doctor. If a teen has a health condition that could affect his ability to safely workout, the gym may require his doctor’s clearance.

A teen should have someone demonstrate the equipment before using it and always have an adult nearby to spot or supervise weight lifting.

Additionally, the teen should follow good practices for safe exercise – warming up for 10 to 15 minutes before exercising and cooling down after the workout.

Children should start going to the gym around the age of two because they need exercise just as much as adults do. The Centers for Disease Control and Prevention advise kids to exercise for at least an hour each day.

Controlling stress, boosting self-esteem, maintaining a healthy weight, developing a healthy body, and improving sleep are all advantages of regular exercise for kids. The kind of exercise a child engages in at the gym depends on his age and level of physical development.

Planet Fitness

Based in Hampton, New Hampshire, Planet Fitness  is an American fitness center franchisor and operator. One of the largest fitness club franchises in terms of both members and locations, the company claims to have 2,039 clubs.

There are franchises for this company in the US, Canada, Australia, Panama, Mexico, and the Dominican Republic.

It has received both praise and criticism for its environment because it bills itself as a “Judgement Free Zone that welcomes new and casual gym goers. It is reportedly the fastest-growing fitness center franchise in the country.

Planet Fitness Age Limit

  • Anyone who is at least 13 years old is eligible to join.
  • A parent or guardian must be present when a member between the ages of 13 and 17 joins.
  • The membership agreement and a legal waiver authorizing the minor’s use of the club with their consent must be signed by the parent or guardian.
  • Members between the ages of 13 and 14 must always be accompanied by a parent or legal guardian.
  • Parent must be a member or the minor’s Black Card guest.
  • The company Planet Fitness does not offer daycare services.
  • Children and minors cannot be left unsupervised while a parent or guardian is at work.